Create GTM Account, Containers, and Integrate the GTM Snippet on Your Site
This guide is based on Google Tag Manager (GTM) official documentation and best practices. It helps you set up a Web (client-side) and Server (server-side) tracking setup from scratch: create an account and containers, add the GTM snippet to your web pages, and verify the integration.
Overview
- Account and containers: GTM is organized as Account → Container → Workspace. You create one account (e.g. company or brand), then one or more containers—Web for your website and optionally Server for server-side tagging.
- Web snippet: After creating a Web container, you get two code snippets: one for the
<head>and one for the<body>. Adding both to every page ensures GTM loads early and works even when JavaScript is disabled (via the<noscript>fallback). - Workspaces and versions: Each container has workspaces for editing. When you Submit, changes become a Version so you can roll back if needed.
- Verification: Use GTM Preview and Tag Assistant to confirm the container is loading and connected on your site.
Google’s step-by-step guides: Create an account and container, Install a web container.
1. Create Account and Containers (Web and Server)
GTM is structured as Account (top level) → Container (Web, Server, Android, or iOS) → Workspace (where you edit). Free GTM supports multiple workspaces per container and full version history.
1.1 Create an account (Account)
Step 1. Go to tagmanager.google.com and sign in with your Google account.
Step 2. Click Create Account.
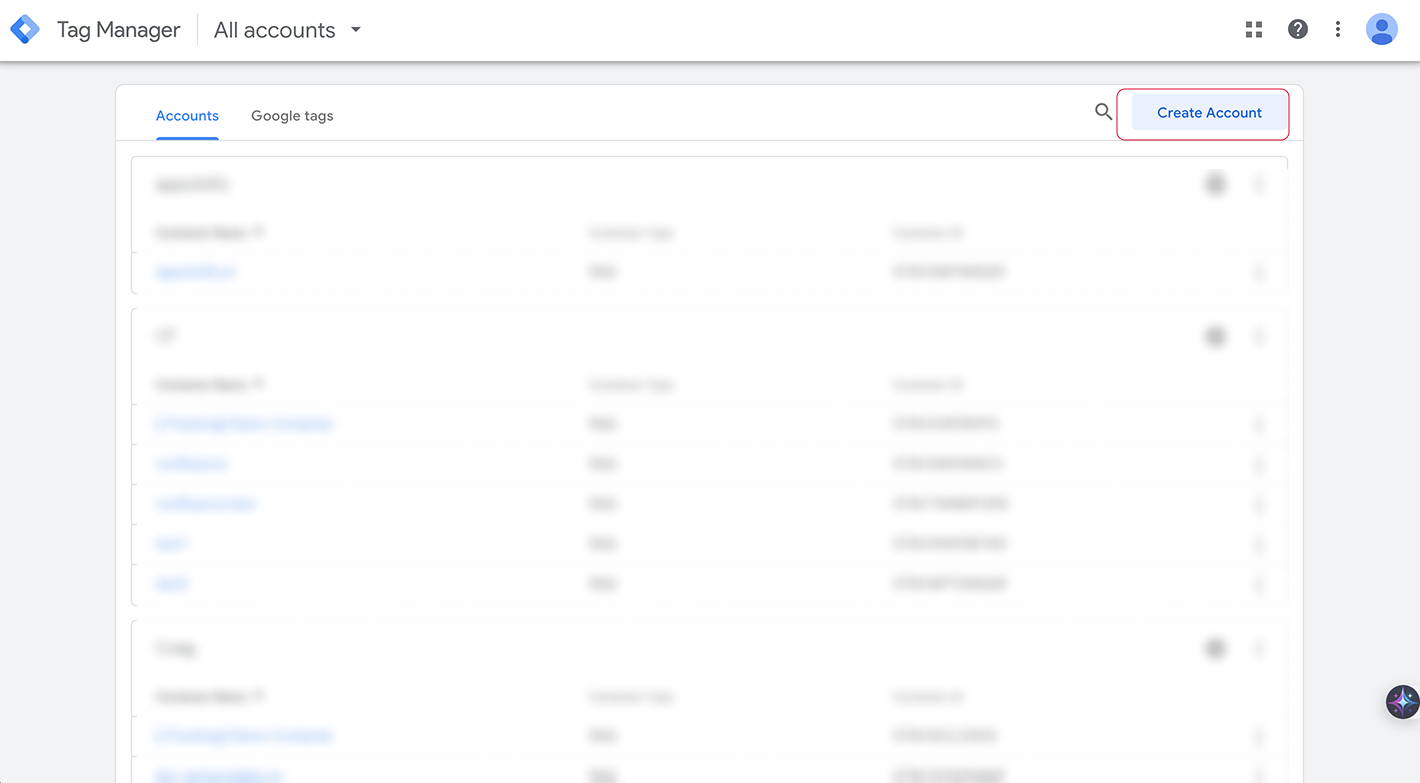
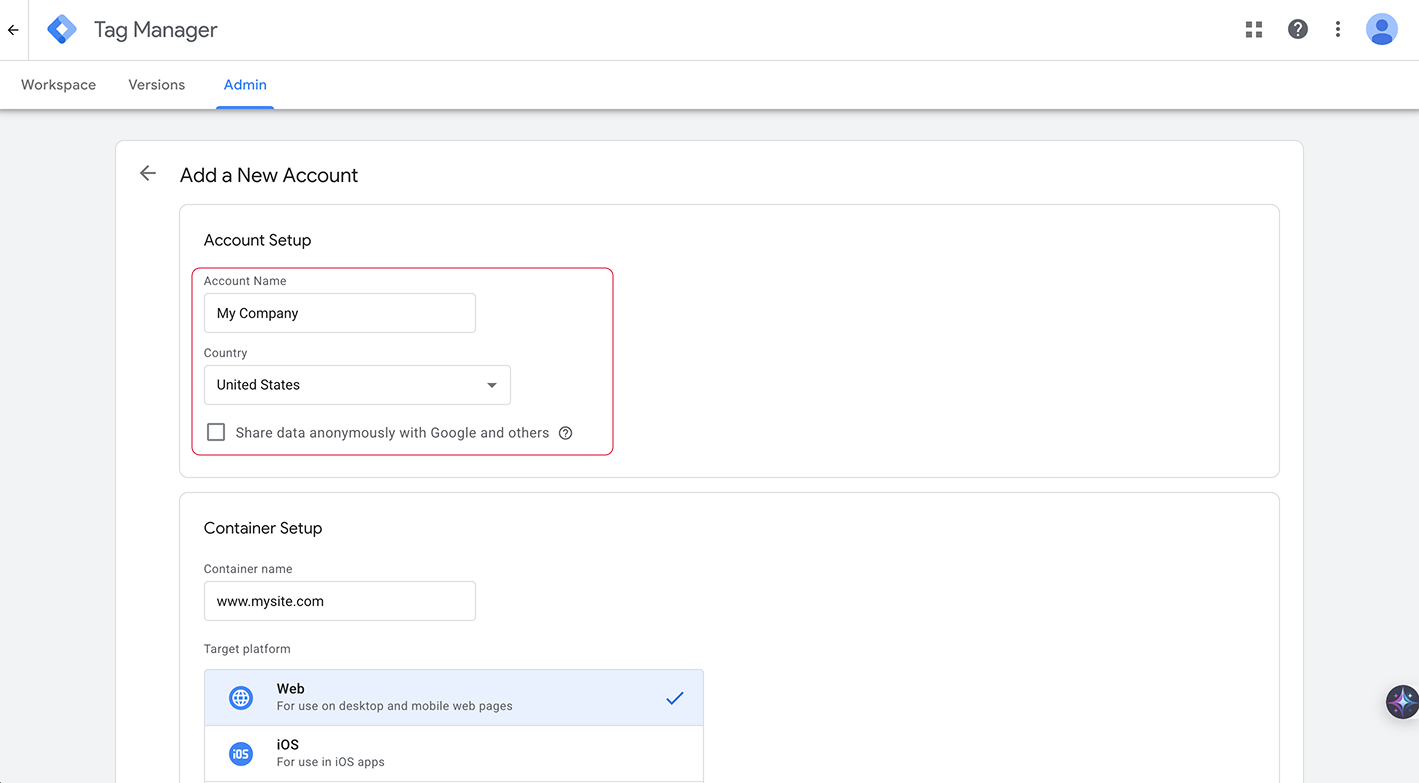
Step 3. Enter Account Name (e.g. company or brand name, such as “MyCompany”) and select Country.
1.2 Create a Web container
Step 1. On the same setup screen (right after creating the account), fill in the first container:
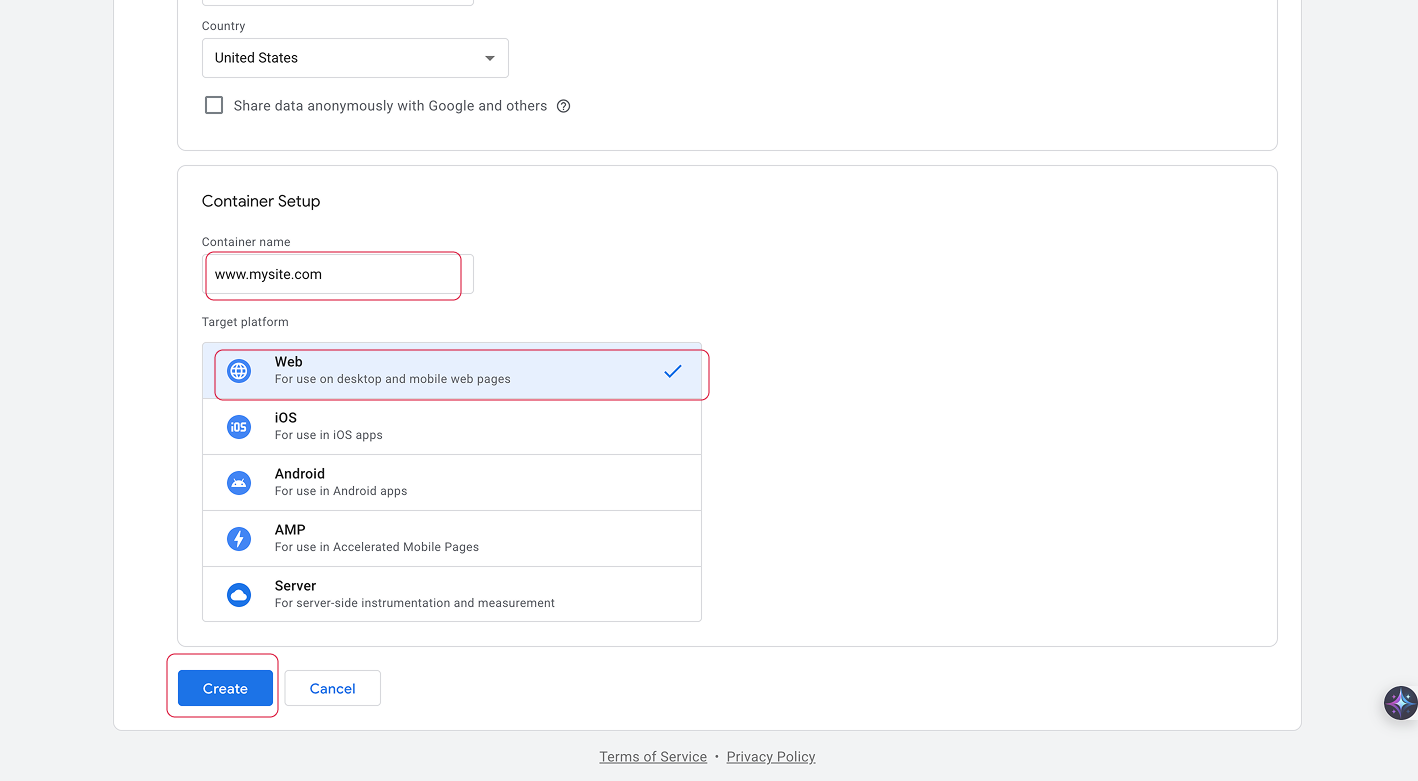
- Container Name: Usually your website domain (e.g.
www.example.com). - Target Platform: Select Web.
- Click Create. Accept the Terms of Service if prompted. GTM opens your new Web container and may show a dialog with the two installation code snippets (head and body). You can use that dialog now or open it later via the container ID at the top of the interface.
Note: If you closed the installation dialog, click the container ID at the top of the GTM interface (e.g. GTM-XXXXXX) to open it again and copy the snippets.
1.3 Create a Server container (optional)
Step 1. In the GTM interface, open Admin (in the left sidebar or top navigation).
Step 2. In the Container column, click the + (plus) button to add a new container.
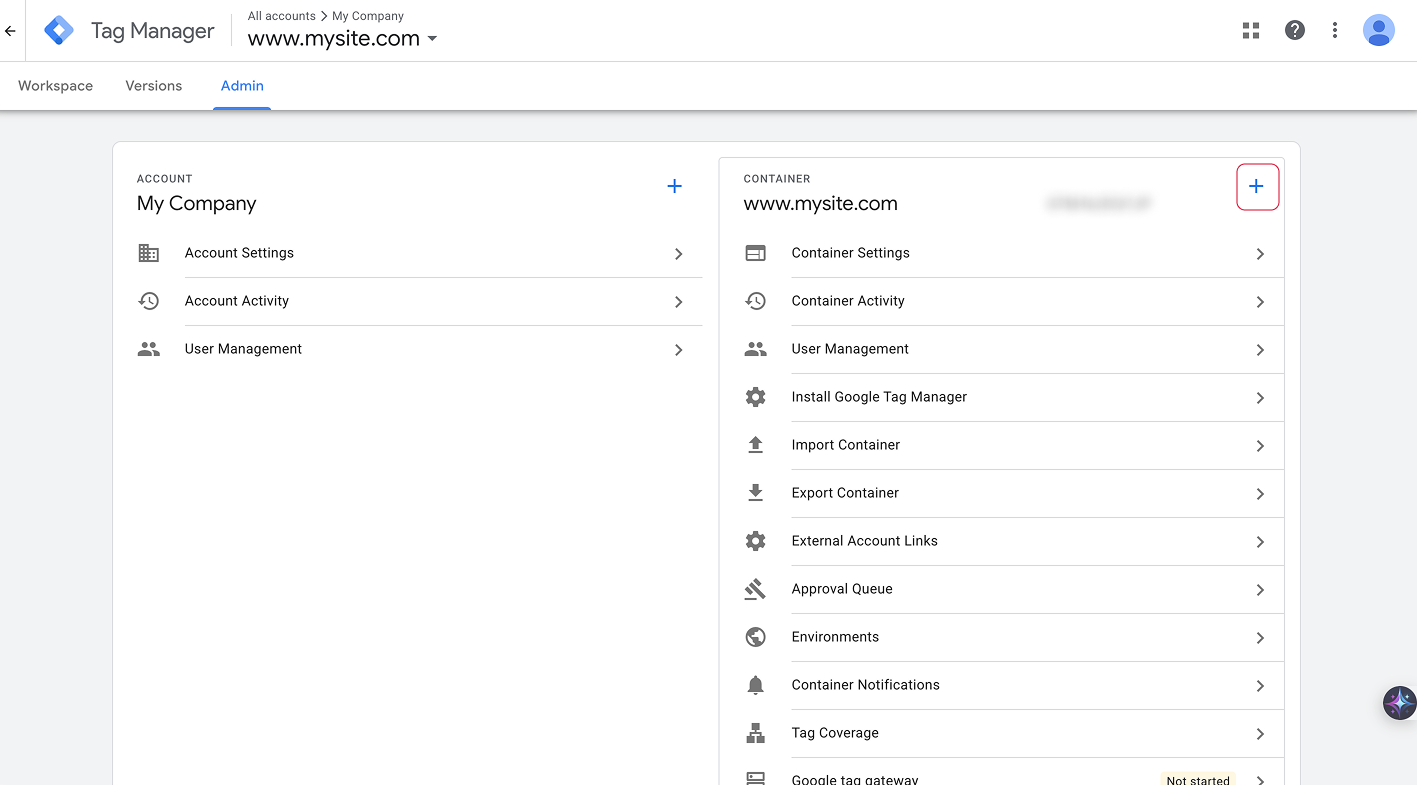
Step 3. Enter a Container Name (e.g. “Server – example.com”) and set Target Platform to Server. Click Create.
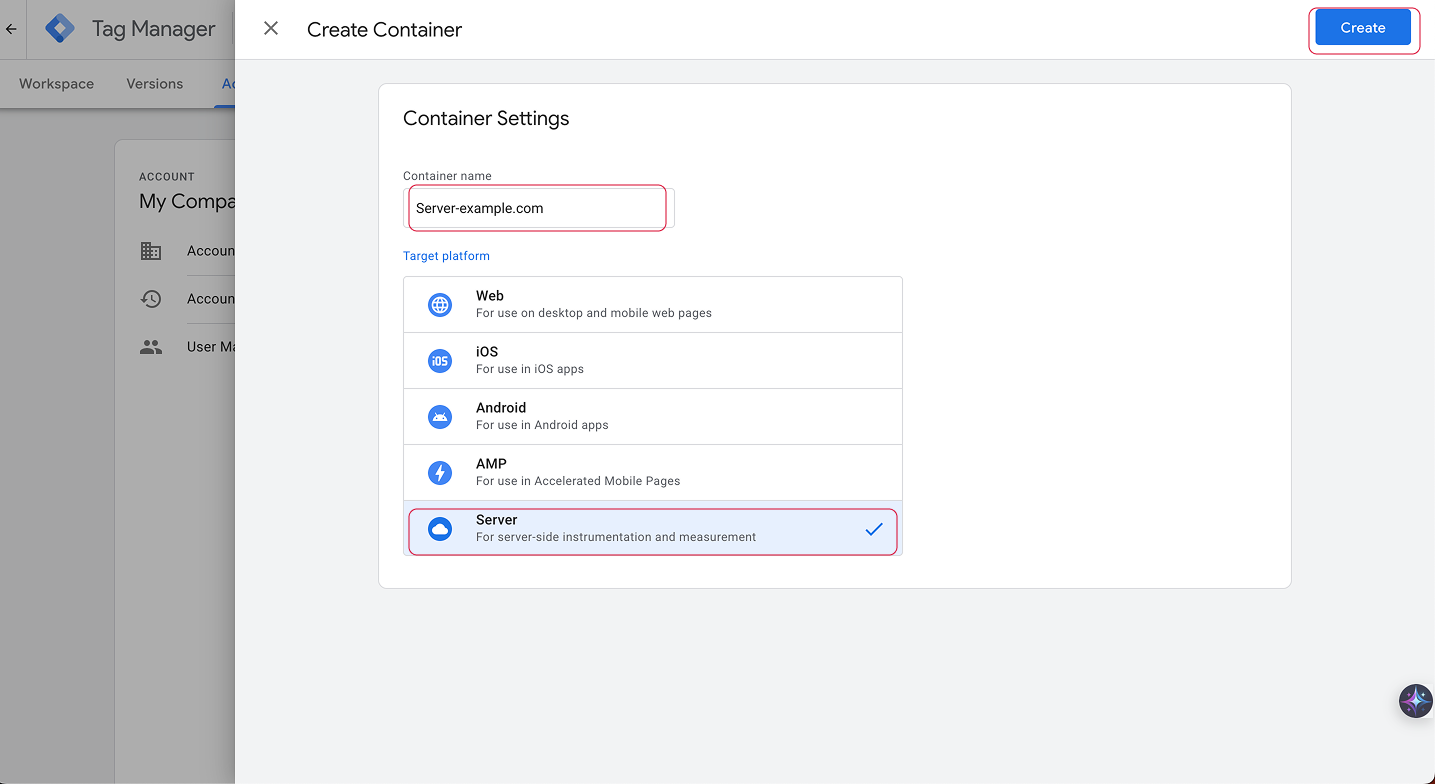
Note: A Server container must be deployed on a server (e.g. Google Cloud Run, Stape.io, or a JTracking-hosted sGTM). Creating the container in GTM only gives you the container configuration; you still need to set up and run the server yourself or via a provider. See Create an account and container for the official flow.
1.4 Workspaces and versioning
- Default Workspace: Each container has a Default Workspace where you edit tags, triggers, and variables. Free GTM allows 3 workspaces per container; you can create more under Manage workspaces (e.g. one for “GA4 rollout”, one for “Facebook pixel”).
- Versions: When you click Submit, all changes in the current workspace are saved as a new Version. You can view and restore past versions in the Versions tab.
- Sync with others: If someone else has published a new version, use Update Workspace in your workspace to pull the latest published changes into your workspace and avoid overwriting their work.
2. Add the GTM Snippet to Your Web Pages
After creating a Web container, GTM shows two code snippets. Add both to every page you want to track so the container loads correctly and you capture events as early as possible.
2.1 Get your container snippets
Step 1. In GTM, open the Web container you created. If the installation dialog is not visible, click the container ID at the top of the page (e.g. GTM-XXXXXX) to open the dialog with the two code blocks.

Step 2. Copy the first snippet (the <script>...</script> block) for the <head> section. Copy the second snippet (the <noscript><iframe>...</iframe></noscript> block) for the <body> section. Replace GTM-XXXXXX in both with your actual container ID if it is not already there.
2.2 First snippet: in <head>
Step 1. Open your site’s HTML (or the theme/CMS file that outputs the <head>). Place the first snippet as high as possible in the <head>, ideally right after the opening <head> tag.
Step 2. Paste the script. It looks like this (use your real container ID instead of GTM-XXXXXX):
<script>(function(w,d,s,l,i){w[l]=w[l]||[];w[l].push({'gtm.start':
new Date().getTime(),event:'gtm.js'});var f=d.getElementsByTagName(s)[0],
j=d.createElement(s),dl=l!='dataLayer'?'&l='+l:'';j.async=true;j.src=
'https://www.googletagmanager.com/gtm.js?id='+i+dl;f.parentNode.insertBefore(j,f);
})(window,document,'script','dataLayer','GTM-XXXXXX');</script>
Reason: Loading GTM early in <head> helps capture page lifecycle events (e.g. DOM Ready, Window Loaded) and reduces the risk of missing data. See Install a web container.
2.3 Second snippet: right after <body>
Step 1. In the same (or corresponding) file, find the opening <body> tag. Paste the second snippet immediately after <body>.
Step 2. The snippet is a <noscript> fallback so that when JavaScript is disabled, a minimal tracking pixel still loads. It looks like this (again use your real container ID):
<noscript><iframe src="https://www.googletagmanager.com/ns.html?id=GTM-XXXXXX"
height="0" width="0" style="display:none;visibility:hidden"></iframe></noscript>
Note: Repeat for every page or template that should run GTM (e.g. all pages of your site, or all layouts that include the global head/body). If you use a CMS or tag management that injects code site-wide, add both snippets there once so they appear on all pages.
3. Verify the Integration
After adding the snippets, confirm that the container loads and connects on your site using GTM Preview and Tag Assistant.
Step 1. In the GTM interface, open the Web container and click Preview (top right).
Step 2. In the Tag Assistant window that opens, enter your website URL (e.g. https://www.example.com) in Your website's URL and click Connect.
Step 3. Your site opens in a new window with debug parameters. In Tag Assistant, check that it shows Connected (or “Connected!”) to your site and that your container ID (e.g. GTM-XXXXXX) appears. A green or active status for the container ID usually means the container is loading and the data path is working.
Step 4. In the left Summary panel, confirm that events such as Container Loaded, DOM Ready, and Window Loaded appear. Click an event and check the Tags tab on the right to see which tags fired. If your container has no tags yet, you may only see the container load; once you add tags (e.g. via JTracking or manually), they will show here after you trigger the corresponding events on the site.
If the connection fails, confirm both snippets are on the page, the container ID matches, and there are no script errors blocking GTM. For full installation and troubleshooting steps, see Install a web container.